The Silent Barrier Between You and Your Best Stories
Imagine you have a phone full of beautiful memories. You have clips of your child's first birthday, your best friend's wedding, or that stunning sunset from your last summer trip. You want to share these moments with the world, but they are just messy, shaky clips. You try to put them together, but it looks like a disaster.
That sinking feeling in your chest is something every new creator knows. It feels like everyone else has a secret skill that you just cannot grasp. You see people on social media posting smooth, beautiful videos while you are stuck with a pile of digital "garbage." This gap between your vision and the reality is a heavy weight.
Many people never start their creative journey because the wall feels too high. They fail to find a clear path because of several reasons:
- Software looks like a spaceship cockpit. There are too many buttons and sliders that make you feel small and confused.
- The internet is full of "expert" talk. You search for help and find people using words like "bitrate" or "frame rates" without explaining what they mean.
- Bad hardware fear. You think you need a $5,000 computer just to cut two clips together, which is simply not true.
- Information overload. You watch ten different tutorials and every single one tells you to do something different.
- Fear of judgment. You are afraid that if your first video isn't perfect, you should not bother trying at all.
This constant struggle does more than just stop you from making videos. It eats away at your confidence and your creative spirit.
- You stop filming important moments because you know the footage will just "sit there" forever.
- You feel isolated from the digital world because you cannot speak the language of video.
- The anxiety of wasting time keeps you from opening your computer to try again.
- You feel like you are falling behind as video becomes the main way people communicate today.
- The pressure to be "pro" right away makes you lose the joy of simply telling a story.
Let’s be honest about the reality of technology. These tools are just hammers and nails. They are not magic wands. The machine is not the artist; you are the artist. When you don't know the basics, the machine controls you. But once you learn the "grammar" of editing, you take the power back.
It is not about having the most expensive software. It is about understanding how humans see images and hear sounds. You are building a bridge between your heart and the viewer’s eyes. This guide is here to give you that bridge. Let’s move from a place of fear to a place of total creative control.
A Practical Roadmap to Your First Professional Edit
Getting started in video editing is not about being a genius. It is about following a logical path. If you follow these first three steps, your videos will look better than 90% of the clips on the internet.
Finding Your Tools and Setting Up Your Workspace
The first thing you need to understand is that you do not need the most powerful computer on earth. Many beginners stop before they start because they think their laptop is "too old." In the modern world, even a basic smartphone has more power than the computers used to edit famous movies in the past.
When choosing software, start with something that makes sense for your level. If you are on a PC, look for simple tools like CapCut or DaVinci Resolve (the free version). If you use a Mac, iMovie is already there waiting for you. The goal is to find a tool that does not scare you away.
Think of your computer memory (RAM) like the size of your physical desk. If you have a small desk, you can only work on one thing at a time. If you have a big desk, you can spread out all your papers. If your computer is slow, try to close all other apps like Chrome or Spotify. Giving your editing software all the "desk space" will make your work much smoother.
I suggest you pick one tool and stay with it for at least a month. Jumping from one app to another is the fastest way to get frustrated. Mastery comes from repetition and patience. Once you know where the "Cut" button is in one app, you will find it easily in others.
The Secret Power of File Organization
Before you ever touch a timeline, you must become a master of folders. Most beginners just drag every file onto their desktop and hope for the best. This is a recipe for a massive headache. If you lose one file, your entire project might break.
Imagine you are a chef in a busy kitchen. If your salt is in the fridge and your knives are in the garage, you will never finish the meal. You need everything in its place. I recommend creating a main folder for every project you start.
Inside that main folder, create four smaller folders:
- Footage: This is for your raw video clips from your camera or phone.
- Audio: Put your music, voice recordings, and sound effects here.
- Graphics: This is for photos, logos, or titles you want to use.
- Exports: This is where your finished masterpiece will go.
When you keep your files organized, your brain stays calm. You can find what you need in two seconds instead of twenty minutes. This simple habit is what separates the pros from the amateurs. It allows you to focus on the art instead of looking for a missing file.
I also suggest naming your clips immediately. Instead of "IMG_4922," name it "Sunset_Beach_CloseUp." This makes it much easier to search for specific moments later. You are building a system for your future self. Your future self will thank you when you aren't searching through hundreds of random numbers.
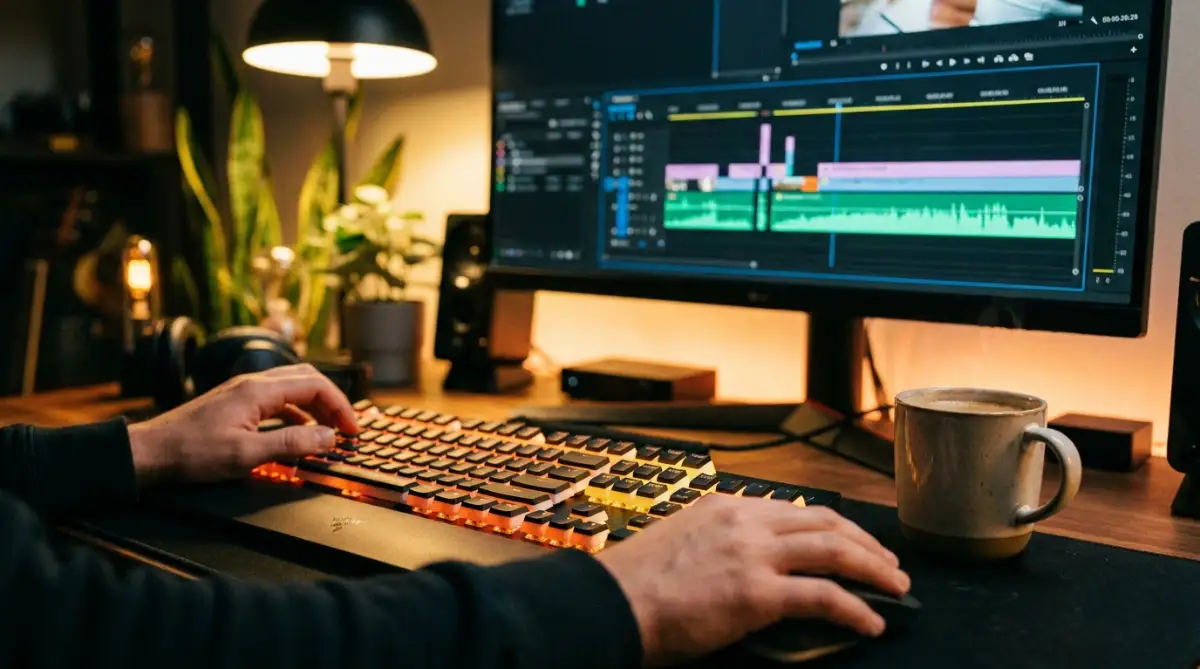
Understanding the Language of the Timeline
The timeline is the heart of every editing software. It is where you lay out your story from left to right. Most beginners find the timeline scary because it looks busy. But it is just a visual map of time.
The most important thing to learn is "The Cut." This is the moment one clip ends and another begins. A good cut should feel natural, like a blink of an eye. If a clip stays on screen for too long, the viewer gets bored. If it is too short, they get confused.
Think of your video like a conversation. You wouldn't talk for ten minutes without stopping to breathe. Each clip is like a sentence. The cut is the period at the end of that sentence. You want to cut when the action or the emotion changes.
I suggest you try the "J-cut" and "L-cut" technique early on. A J-cut is when you hear the sound of the next clip before you see the picture. An L-cut is when the picture changes, but the sound from the last clip continues. This is a professional trick that makes your video feel smooth and "expensive."
Another thing to watch is your "A-roll" and "B-roll." A-roll is your main footage, like a person talking. B-roll is the extra footage that shows what they are talking about. If a person says, "The coffee was hot," show a clip of steam rising from a cup. This keeps the viewer’s eyes busy and makes your story much more engaging.
The Psychology of Visual Pacing
Lenders and banks don't care about your pacing, but your audience does. When you edit, you are managing the viewer's "Cognitive Load." This is a scientific way of saying you are making sure their brain does not get too tired.
If you use too many flashy transitions like "star wipes" or "3D spins," the brain gets distracted. It stops looking at the story and starts looking at the "trick." A simple Hard Cut or a Cross Dissolve is usually all you need. The best editing is the kind that the viewer does not even notice.
I suggest you watch your favorite movie or YouTube channel with the sound off. Watch how often they cut. You will be surprised to see a cut happens almost every 3 to 5 seconds. This keeps the energy high. Try to match this "pulse" in your own work. It will make your videos feel much more professional and alive.
Why Sound is 70% of Your Video
Here is a secret that many beginners ignore: sound is more important than the picture. A person will watch a blurry video if the sound is clear. But they will turn off a 4k video if the sound is scratchy or too quiet.
When you are learning the basics, spend time on your audio levels. Your background music should never be louder than the person talking. Think of the music like a blanket; it should be there to keep the scene warm, but it should not cover the whole bed.
Use "Fade-ins" and "Fade-outs" for your audio. This prevents the sound from "popping" or ending too suddenly. It makes the experience much smoother for the viewer’s ears. Good sound design creates a mood and an atmosphere that your eyes cannot build alone.
I suggest using a simple "Normalizer" tool if your software has one. This keeps your volume at a steady level so the viewer does not have to keep changing their remote volume. Being kind to your viewer’s ears is the fastest way to get them to come back and watch your next video.
Mastering the Narrative Flow
Video editing is not just about cutting; it is about sculpting. You start with a big block of marble (your raw footage) and you cut away the parts that don't look like your statue. Every clip you keep should serve a purpose. Ask yourself: "Does this clip help the story move forward?"
If the answer is no, be brave and delete it. This is what pros call "killing your darlings." Sometimes your favorite clip just doesn't fit the vibe of the whole project. Trust your gut. A short, tight video is always better than a long, boring one.
Think of your edit as a journey. You need a beginning (The Hook), a middle (The Story), and an end (The Payoff). Your first 5 seconds are the most important. You need to show the viewer exactly why they should stay. This is how you win the battle for attention in a digital world.
By following these steps—picking the right tool, organizing your house, and mastering the timeline—you are no longer a beginner. You are a student of the craft. You are someone who understands that great things take time to build. You are ready to start creating.
In the next part of this guide, we will look at how to use color to change the mood of your video. We will also talk about how to export your video so it looks great on every screen. You have the vision, you have the steps, and now you have the foundation. Let’s keep moving forward!
Section 3: Mastering the Art of Visual Mood and Speed
Now that you know how to organize files and make clean cuts, it is time to look at the expert level. These are the secrets that move your work from "home movie" to "professional cinema." Most people stop at just cutting clips, but you are going to learn how to control the emotion and the efficiency of your workflow.
Painting with Light: The Magic of Color
The first advanced step is understanding that color is a language. Many beginners record video that looks a bit grey or washed out because of the lighting. You can fix this through a process called Color Correction.
Think of color correction like cleaning a dirty window. You are fixing the "exposure" so the image is not too bright or too dark. You are also fixing the "white balance" so the white parts of your video actually look white instead of yellow or blue. This is the foundation of a good look.
Once the video looks "correct," you can move to Color Grading. This is where you add a specific mood or style. If you want a sad scene, you might add a touch of blue. If you want a happy, summer vibe, you add warm oranges and yellows.
I suggest you think of color grading like seasoning a meal. Too much salt ruins the food. Too much grading makes the video look fake and hard to watch. Start with small changes and always check how it looks on different screens like your phone and your laptop.
The Piano Player Method: Using Keyboard Shortcuts
If you want to edit like a pro, you must stop using your mouse for everything. Professional editors look like piano players because their hands are always moving on the keyboard. This is because keyboard shortcuts save you hours of work every week.
Imagine you have to cut a clip 100 times. If you click the "razor tool" with your mouse every time, it takes 2 seconds. If you press the "C" key, it takes half a second. Over a long project, these small moments add up to massive time savings.
Learn the "Big Three" shortcuts for your software. Usually, these are 'V' for the selection tool, 'C' for the cut tool, and 'Spacebar' for play and pause. Once these become "muscle memory," you will stop thinking about the software and start thinking about the art of the story.
A Professional Roadmap for Long-Term Growth
Getting one video done is great, but becoming a master is a long-game. You need a system to stay sharp and keep your skills growing every day. I recommend you follow these simple professional guidelines to maintain your edge.
First, you must follow the Golden Rule of Three for backups. Always keep your project files in three places: your computer, an external hard drive, and a cloud service. I have seen creators lose months of work because their laptop died. Don't let this be you.
Second, treat your eyes like a library. Watch movies and high-quality YouTube channels, but watch them as an editor. Look at where they cut. Notice when the music gets louder or softer. Try to copy one specific move in your next project.
Third, commit to a "Daily Edit" for thirty days. It doesn't have to be a masterpiece. Even a 15-second clip of your cat can teach you something new. Consistency beats talent every single time in the world of video editing.
Lastly, always ask for "Honest Feedback." Show your work to someone who will tell you the truth, not just your mom. Listen to where they got bored. If they looked away from the screen, that is where you need to shorten the clip. Learning from your audience is the fastest way to get better.
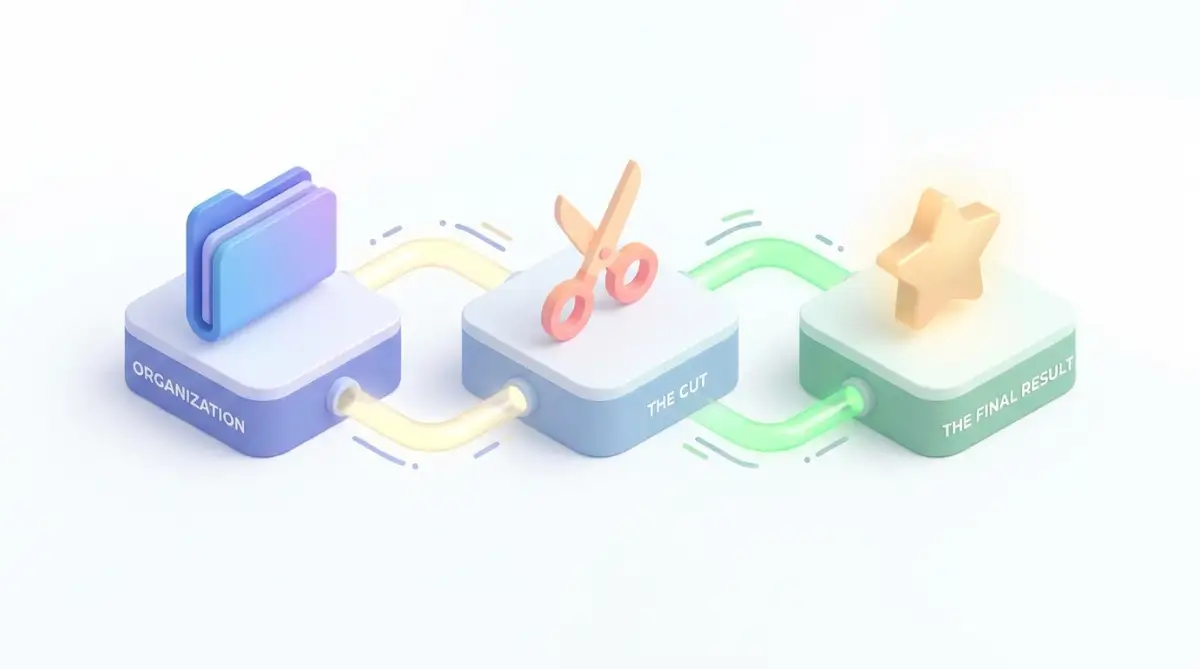 Image Here-----------------
Section 4: The Danger Zones: Mistakes That Sink Beginner Projects
Even with the best tools, it is easy to fall into traps that make your video look amateur. I have made these mistakes myself, and I want to help you avoid the pain. Here are the five biggest pitfalls and how to walk around them.
1. The "Transition Fever" Disaster
When you discover the "Transitions" tab, it feels like a toy store. You want to use the "cube spin," the "heart wipe," and the "star zoom" in every cut. Please, don't do this.
Flashy transitions scream "beginner." They distract the viewer from the actual story you are trying to tell. In the professional world, 99% of cuts are "Hard Cuts" (one clip simply replaces another) or "Cross Dissolves" (a soft fade). Use transitions like a secret spice—only use them when they truly serve the meaning of the scene.
2. The Muffled Sound and Background Noise Trap
As I mentioned in Part 1, audio is more important than video. A common mistake is letting the background music drown out the voice. If people have to strain their ears to hear what you are saying, they will leave.
Always keep your voice levels around -6dB and your music much lower, around -20dB to -25dB. Use "Audio Ducking" if your software has it. This automatically lowers the music whenever someone starts talking. If your audio is bad, your whole project is considered low quality by the viewer.
3. The "Moved File" Horror Story
This is a technical mistake that breaks your project. Editing software does not "save" your video inside the app. It only "links" to where the file is on your computer. If you move your clips from the "Downloads" folder to a "New Folder" after you start editing, the software will show a "Media Offline" error.
This is why the organization tips from Part 1 are so important. Set your folders first, put your files inside, and never move them until the project is finished and exported. If you break the link, you might have to spend hours reconnecting every single clip manually.
4. The Jumpy Frame Rate Mess
Many beginners mix clips from different cameras without checking the settings. If you film one clip at 24 frames per second (fps) and another at 60 fps, the video can look jittery or weirdly fast.
Before you start, decide on your "Timeline Frame Rate." For a cinematic look, use 24 fps. For a standard vlog look, use 30 fps. If you have 60 fps footage, use it for slow-motion moments. Mixing them randomly makes the brain feel like something is "wrong" with the screen, even if the viewer doesn't know why.
5. Editing Without a Goal or "Why"
The biggest mistake is sitting down to edit without a plan. You have five hours of footage and you just start dragging clips. You will get overwhelmed and quit. This is called "Edit Paralysis."
Always write a simple "Paper Edit" first. List the three main points of your video. Choose only the clips that support those points. If a clip is beautiful but doesn't help the story, delete it. Your job is to be a gatekeeper. Only the best of the best should make it to the final version.
Section 5: Taking the Leap into Your New Creative Life
You have now moved from "someone with a phone" to "someone with a skill." You understand how to organize, how to cut, how to use color, and how to avoid the traps. This is a huge achievement. You should feel proud of the progress you have made by reading this guide.
The world is hungry for stories. Your story is unique, and you now have the tools to tell it in a way that people will actually want to watch. Don't wait for the "perfect" camera or the "perfect" idea. Start today with the messy footage you already have.
Remember that every great editor you see today started with a confusing timeline and a shaky clip. They got better because they kept clicking, kept cutting, and kept learning. You are on that same path now. Your next video will be better than your last, and that is the only thing that matters.
I want you to take one small action right now. Open your editing app and try one keyboard shortcut. Just one. Then, fix the color on a single 5-second clip. Small wins build mountains of success. Go out there and create something that makes you smile. Your creative journey has just begun!