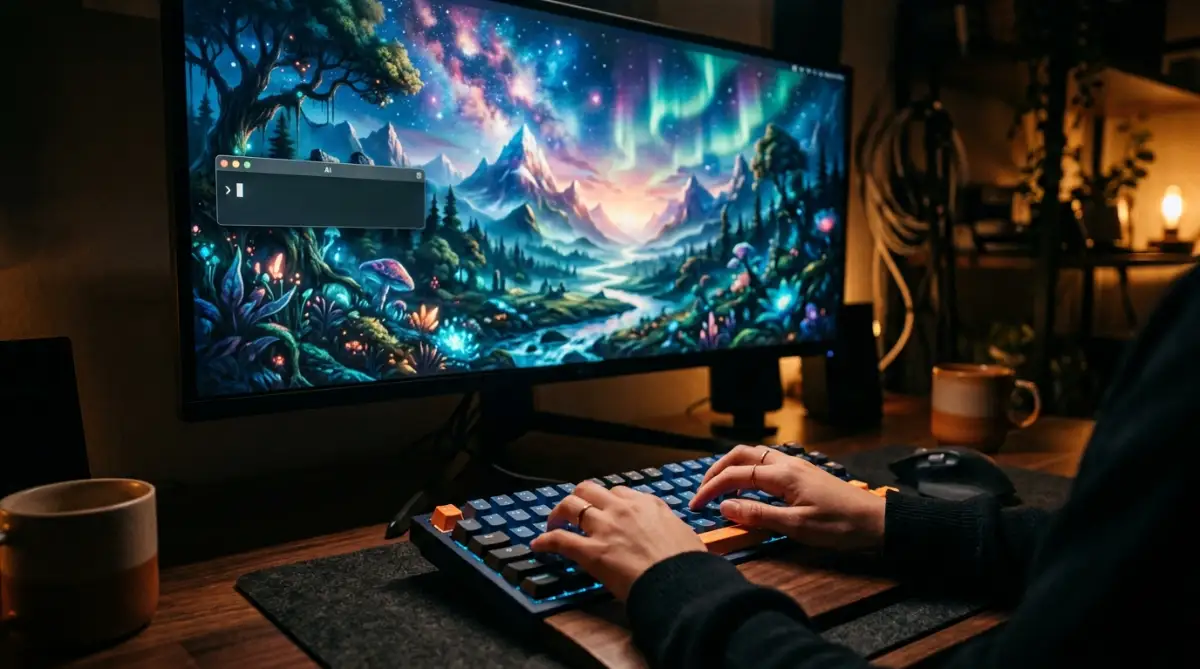
The Quiet Frustration of the Empty Text Box
You open your favorite AI art tool with a brilliant vision in your mind. You see a majestic mountain range glowing under a purple moon with a lone traveler walking toward a hidden castle. You type "A traveler in the mountains at night" and hit enter. The screen loads, and the result is a blurry mess with six-fingered hands and a sky that looks like a smudge.
That sinking feeling in your chest is something we all know. It feels like the machine is speaking a different language that you just can't master. You have the creativity, but you lack the "secret code" to make the computer understand you. This gap between your dream and the actual image is a heavy weight that kills your motivation.
Many people give up on AI art because they feel like they are shouting into a dark void. They fail to get professional results for several reasons:
- Vague language leaves too much for the AI to guess, and the AI usually guesses wrong.
- Overwhelming the AI with too many words confuses the system, leading to robotic artifacts.
- Lack of technical knowledge about lighting and camera angles makes images look flat and boring.
- Following bad advice from random social media posts that use "magic" words that don't actually work.
- Ignoring the "logic" of how an AI sees the world through pixels and patterns.
This constant cycle of typing and failing hurts your confidence and your peace of mind.
- You start to doubt your own talent as a creator or a designer.
- The anxiety of wasting time keeps you from experimenting with new ideas.
- You feel isolated because it seems like everyone else is making masterpieces while you struggle.
- The pressure of a project deadline makes you want to shout at the screen when the AI fails.
- You feel like you are falling behind in a world that is moving toward AI automation.
Let’s be honest about the reality of generative technology. These systems are not mind readers. They are mathematical models that predict what an image should look like based on the words you give them. When you don't provide the right structure, the AI gets lost in its own data. It isn't that you are a bad artist; you just haven't learned the "grammar" of this new language yet.
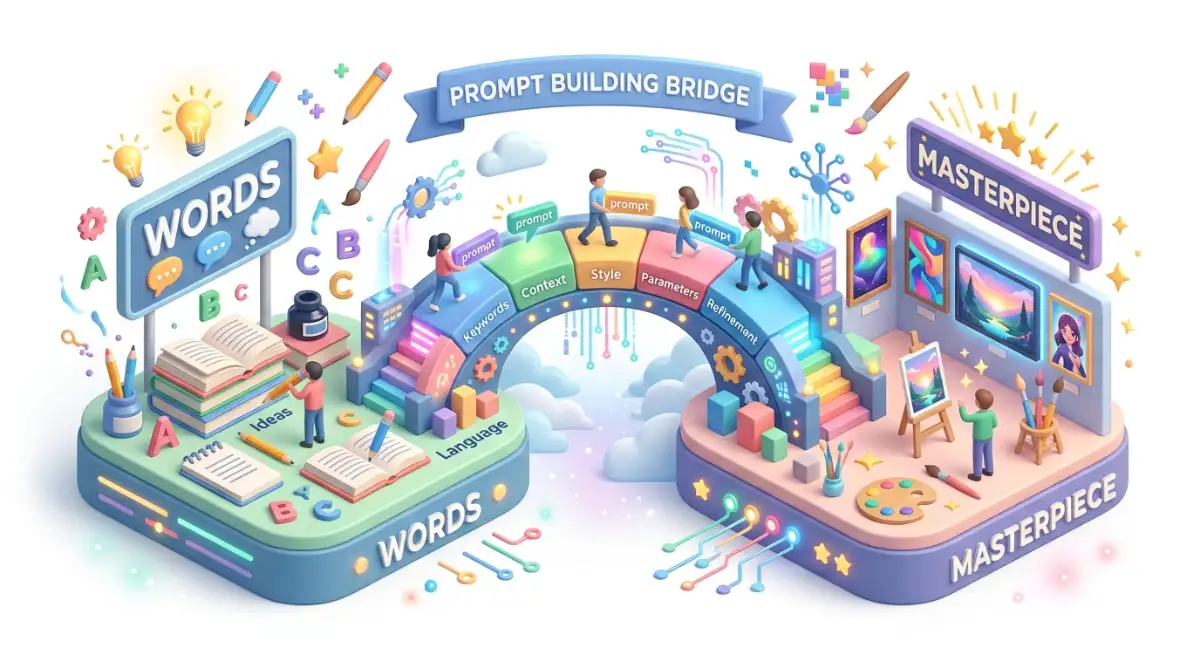
But there is a better way. You can learn to speak the language of the machines. By understanding how to build a prompt from the ground up, you take back control. You move from "hoping" for a good result to "knowing" you will get one. This guide is your roadmap to move from a beginner to a master prompt engineer.
A Scientific Roadmap to Perfect Visual Commands
Getting a perfect image isn't about luck. It is about building a logical structure that the AI can follow like a map. If you follow these first three steps, your results will improve immediately.
Step 1: Start with the Noun and Specific Detail
The first mistake most people make is being too broad with their main subject. If you say "a cat," the AI has millions of ways to draw a cat. It might give you a cartoon cat, a dead cat, or a pink cat. To get what you want, you must be specific with your nouns and adjectives.
Instead of "a cat," try "A fluffy Maine Coon cat with golden fur." This narrows down the search for the AI. It tells the system exactly which breed and which color to focus on. Specificity is the enemy of the robotic "blob."
Think of it like giving directions to a taxi driver. You wouldn't just say "take me to the city." You would give them a street name and a house number. Your prompt needs that same level of detail for the core subject.
I suggest using active verbs to describe what the subject is doing. "A Maine Coon cat sleeping on a velvet cushion" is much more powerful than just "a cat on a cushion." Action gives the AI a reason to place shadows and folds in specific ways. It makes the scene look like a real moment in time rather than a static statue.
Step 2: Choosing the Right Artistic Medium
Once you have your subject, you must tell the AI what kind of art it is making. This is the most ignored part of prompting. If you don't define the medium, the AI will default to a generic "digital art" style that often looks cheap and fake.
Do you want a "hyper-realistic photograph"? Or do you want a "Renaissance oil painting"? Maybe you want a "charcoal sketch" or a "3D Pixar-style render"? Each of these words sends the AI to a completely different part of its memory.
I always recommend thinking about the texture you want. If you want a photo, mention the camera. Say "shot on a 35mm lens" or "National Geographic style." This tells the AI to use real-world light and lens blur. If you want a painting, mention the brush strokes. Use terms like "impasto" or "watercolor wash."
When you define the medium, you give the image authority and weight. It stops looking like an AI generated it and starts looking like a human artist created it. This is how you get those "how did you do that?" reactions from your friends. You are defining the "soul" of the image by choosing its physical form.
Step 3: Mastering Lighting and Atmosphere
Light is the language of photography and art. If your light is bad, your image will be bad, no matter how good the subject is. Most beginners forget to describe the lighting conditions, which leads to flat, dull images.
Think about the mood you want to create. If you want something magical, use "golden hour lighting" or "soft morning mist." If you want something dramatic, try "high-contrast lighting" or "rim lighting."
Light tells the AI where to put the shadows. It defines the depth and the 3D space of the scene. Without light, your traveler in the mountains will look like a sticker pasted on a flat background. With "volumetric lighting and purple moonlight," the traveler will have a glow on their shoulders and deep shadows at their feet.
I suggest you use environmental cues to help the AI. Words like "dust motes in the air" or "rain-slicked streets" change how light reflects off surfaces. This creates a level of realism that makes people stop and stare. You are no longer just making a picture; you are building a world with its own physics and its own atmosphere.
Why Contextual Cues are Your Secret Weapon
AI models love to have a "why" for everything in the frame. If you place your subject in a specific environment, the AI understands the scale better. A "knight in a dark forest" is easier for the AI to draw than just a "knight."
The forest gives the AI a floor, a ceiling (the leaves), and a background. This helps the machine calculate perspective. It knows that the knight should be smaller than the trees. It knows that the light should come through the gaps in the branches.
I recommend adding background details that support your main story. If your knight is tired, mention "dented armor and a tattered cape." If the forest is old, mention "gnarled roots and thick moss." These small details act as anchors for the AI's logic. They prevent the system from getting "creative" in ways that don't match your vision.
The Power of Negative Prompting
While we focus on what we want, we also need to think about what we don't want. Most modern AI tools allow you to use "negative prompts." This is where you list things you want the AI to avoid.
Common negative keywords include "blurry," "deformed hands," "watermark," or "extra limbs." By telling the machine what to stay away from, you save hours of editing time. You are cleaning up the workspace before the AI even starts to draw.
Think of this like a sculptor removing the extra clay. You are defining the boundaries of the masterpiece. This ensures that the final result is clean and professional. It is a pro-level move that separates the amateurs from the experts.
Using Analogies to Explain Complex Ideas
If you find it hard to describe a complex feeling, try using an analogy. You can tell the AI to make an image that feels "like a dream within a dream" or "like the silence after a heavy snowfall."
While the AI might not understand the deep philosophy, it understands the visual patterns associated with those ideas. A dream feels soft and blurry. Snowfall feels white and quiet. These emotional words help the AI choose a color palette that matches your heart.
I suggest mixing these abstract feelings with your concrete details. "A Maine Coon cat with fur that looks like spun gold" is much better than just "yellow fur." The word "spun gold" tells the AI to add a metallic shine and a thread-like texture. You are using the beauty of the English language to unlock the beauty of digital art.
How to Stay Organized in Your Prompting Journey
As you learn to prompt, you will find certain combinations that work perfectly every time. Don't lose these! Create a "Prompt Diary" on your computer or in a simple notebook.
Record your prompt, the tool you used, and the result. When you see something you love, break it down. Why did that work? Was it the lighting? Was it the camera angle? By analyzing your wins, you build a personal library of success.
This organization will make your creative process feel "effortless" over time. You won't be starting from zero every time you open the app. You will be building on top of your past knowledge. This is how you become an authority in the world of AI art.
By following these first three steps—defining the noun, choosing the medium, and mastering the light—you are already ahead of 90% of AI users. You are no longer just playing with a toy. You are using a powerful creative tool with a steady and professional hand.
In the next part of this guide, we will explore advanced techniques like "prompt weighting" and "stylized seeds." We will also look at the common mistakes that ruin even the best prompts. You have the vision; now you have the foundation. Let's keep building your skills so you can create art that truly changes the world.
Mastering the Secret Grammar of AI Art
Now that you have the basic building blocks of a prompt, it is time to look at the advanced techniques. These are the "insider secrets" that professional prompt engineers use to get those museum-quality images. Most people think they just need better words, but often, they actually need better structure and control.
The Science of Word Weighting and Focus
One of the most powerful tools in your hands is the ability to tell the AI which words are more important than others. Think of a prompt like a recipe for a soup. If you want the soup to be spicy, you add more pepper. In AI prompting, we do this through weighting.
Many systems allow you to use colons or parentheses to emphasize a word. For example, if you want a "Mountain landscape with a tiny red flower," the AI might focus too much on the mountains. By writing "Tiny red flower ::2, Mountain landscape ::1," you are telling the computer that the flower is twice as important as the mountains.
I suggest using this whenever your main subject is getting lost in the background. It is like a spotlight on a stage. You are guiding the AI’s "eye" to what truly matters in your vision. This prevents the machine from ignoring the small details that make your art unique and personal.
Refining the Chaos with Parameters and Settings
Beyond the words you type, there are "hidden" commands called parameters. These are like the settings on a professional camera. They control the aspect ratio, how much "chaos" is in the image, and how stylized the final result looks.
If you want a cinematic shot, you should change the aspect ratio. Instead of a square, try a wide-angle format like 16:9. This simple change changes how the AI places objects in the frame. It allows for more horizontal storytelling, giving your images a "big screen" feel.
Another secret is the "Seed" number. Every AI image starts from a random field of digital noise. If you find a style you love, you can lock in that Seed number. This allows you to create different images that all share the exact same lighting and texture. It is the best way to create a consistent series of art for a book or a website.
How to Stay a Master of the AI Canvas Long-Term
To truly excel at AI art, you cannot just learn one list of words and stop there. You need a professional growth plan. The technology changes fast, and you want to be the one leading the way, not the one trying to catch up.
I suggest you spend ten minutes every week looking at "Prompt Galleries" like those found on Discord or specialized forums. Don't just look at the pictures; study the text behind them. Ask yourself why the artist chose a specific camera lens or a specific lighting type. This "visual study" builds your mental library of what works.
You should also keep a clean workspace. Organize your favorite prompts in a simple spreadsheet. Sort them by mood, such as "Dark and Moody" or "Bright and Happy." When a client or a project needs a specific look, you won't have to guess. You will have a proven starting point ready to go.
Finally, treat the AI like a partner, not a servant. If the first result is bad, don't just get angry and quit. Use the "Upscale" or "Region Edit" features to fix the small parts. Mastering the iterative process is what makes you a professional. You are the director, and the AI is your camera crew. Your job is to keep giving better directions until the scene is perfect.
The Traps: Common Mistakes That Ruin Your AI Masterpieces
Even the most creative people often fall into "visual holes" because they don't realize how the machine thinks. If you want to stop getting messy results, you must stay away from these five big mistakes.
1. The "Word Salad" Disaster
Many beginners think that adding more words always makes a better image. They type fifty different adjectives hoping for a masterpiece. This is a huge mistake. Too many words confuse the AI model, leading to weird artifacts like extra fingers or melted faces.
I always recommend starting with a short, punchy prompt. See what the AI does with ten words first. Only add more words if something is missing. A clean prompt usually produces a clean image. Think of it like a conversation; if you shout too many things at once, nobody understands you.
2. Ignoring the Power of Negative Prompts
We often spend all our time thinking about what we want. But what about the things you hate? Most tools have a "Negative Prompt" box. If you leave this empty, you are leaving your image to chance.
You should always list things like "blurry," "distorted," "low resolution," and "watermark" in your negative list. This acts like a safety net. It tells the AI to throw away any "bad" pixels before it even shows you the image. It is the easiest way to make your art look ten times more professional with zero extra effort.
3. Using Emotional Words Without Visual Cues
The AI does not know what "happiness" or "sadness" feels like. If you type "A happy man," the AI just guesses. It might give you a man with a scary, robotic smile. To get a real feeling, you must describe the visual signs of that emotion.
Instead of "happy," try "A man with crinkled eyes, a wide smile, and head tilted back in laughter." Instead of "sad," try "A person looking down with slumped shoulders in a dimly lit room." Describe the body language and the lighting. This is how you give your art a "soul" that people can actually feel when they look at it.
4. Forgetting the Rule of Thirds
AI often puts the subject right in the center of the square. While this is okay sometimes, it often looks boring and "robotic." To make your art look like it was made by a human photographer, you need to use composition rules.
Use phrases like "off-center composition" or "subject on the left third." This creates visual tension and makes the image more interesting to look at. It tells the story of the background as much as the subject. It is a simple trick that separates the "AI hobbyist" from the "Digital Artist."
5. Sticking to Just One AI Model
Every AI tool has its own personality. Midjourney is great for lighting and textures. DALL-E is amazing at following complex instructions. Stable Diffusion gives you total control over the technical settings.
If you only use one tool, you are limiting your creative range. I suggest trying the same prompt in three different tools. You will be shocked at how different the results are. This "cross-training" makes you a better prompt engineer because you learn the strengths and weaknesses of every system.
Your Final Roadmap to Creative Freedom
You now have the keys to the kingdom of digital art. Writing a prompt is no longer just "typing in a box." It is an art form that combines logic, photography, and storytelling. You know how to build a subject, how to set the stage with light, and how to avoid the traps that trip up everyone else.
I want you to take one small action today. Go to your favorite AI generator and try one prompt using the "Weighting" trick we talked about. Change one parameter, like the aspect ratio. See how it changes the "vibe" of your creation. This is how you learn—by doing, by playing, and by being curious.
Remember, the machine is just a tool. The true magic is in your mind. You are the one with the vision. You are the one who knows what beauty looks like. Use these steps to bridge the gap between your imagination and the screen.
The world is waiting to see the art that only you can create. Don't be afraid of the blank text box anymore. You have the knowledge, you have the steps, and you have the power. Go out there and build your masterpiece right now! Your journey to becoming a world-class creator starts with the very next word you type.